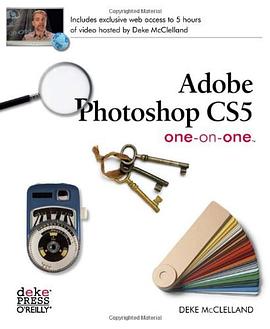

Master the fundamentals of Photoshop CS5 and make all of your images come alive. With Deke McClelland's unique and effective learning system, you get step-by-step tutorials, hours of DVD-video demonstrations, and lots of hands-on projects to help you improve your knowledge and hone your skills. Find out everything you need to know to be productive with Photoshop CS5 right away Learn at your own speed with 12 self-paced tutorials Try out professional techniques with engaging, real-world projects Read about a particular technique and watch the video to see how it's done Follow every key step with hundreds of full-color photos, diagrams, and screen shots Test your knowledge with multiple-choice quizzes in each chapter Adobe Photoshop CS5 One-on-One simulates a classroom environment with one-on-one attention as you proceed from lesson to lesson. Deke's expert advice is like working with a personal coach -- you'll learn Photoshop faster, more creatively, and more efficiently than you thought possible.
Using Content-Aware Fill and Puppet Warp
By Deke McClelland
One of my favorite exercises in my new book employs (count ‘em) two of the coolest new features in Photoshop CS5: Content-Aware Fill and Puppet Warp. Using them together, you can copy an image element from its background to a new layer, fill in the background, and then distort the original subject any which way you like. Here’s a quick play-by-play of the tutorial, which you’ll find explained in detail and helpfully illustrated, from my new book Adobe Photoshop CS5 One-on-One .
1. Open an image. All the exercises in my One-on-One books come with downloadable sample images so you can follow along. For practice, try this on someone whose picture you have handy and you’d like to have temporary if digital control over.
2. Select the subject. The book has loads of advice and techniques for making great selections.
3. Jump the selection to a new layer. Duplicate our subject, aka “Puppet Boy” for later manipulation by pressing Ctrl+Alt+J (Command-Option-J), and give it a name like “Jumping Puppet.”
4. Reload the selection. Reload the selection on the background layer so Content-Aware Fill knows where to do its magic. I’ll show you how to add a little safety zone around the selection as well.
5. Let Photoshop take a crack at filling in the background. Since we’ll be repositioning our puppet-boy’s limbs, we want his background to contain only solid sky, rather than his doppelganger. Here’s how this new feature works: Click the Background layer in the Layers panel to make it active. From the Edit menu, choose the Fill command. In the Fill dialog box, choose Content-Aware from the Use popup menu and click OK . Photoshop assesses the surrounding pixels and makes a pretty good guess on how to fill in the selection. Press Ctrl+D (-D) to deselect the image so you can assess Content-Aware Fill’s work. It’s done a fairly good job for a one-step operation.
6. Heal the ghosts with the healing brush . Yes, Content-Aware Fill is undeniably cool, but you can see that it’s not perfect. (Especially when you know what to look for, the outline of the removed image element is fairly obvious.) To fix those tell-tale shadows use the healing brush (which you can learn about in an earlier exercise in the book.)
7. Convert the Jumping Puppet layer to a smart object . I cover smart objects rigorously in the book, but for now, consider it a simple way to protect your original image and make your steps retraceable.
8. Choose the Puppet Warp command . From the Edit menu, choose Puppet Warp to enter that mode. You’ll notice that your cursor changes to a pushpin with a plus symbol, which indicates that you’ll be adding “pins” as you click with it. Pins let you control how an object stretches in Puppet Warp.
9. Set pins in areas you want to stabilize . Puppet Warp works by allowing you to stretch (or squish) the distance between two pins. Pins also let you lock down your images in places where you don’t want them to move. You can see, I’ve placed pins at key points along our subject’s body that I want to control.
11. Apply the Puppet Warp effect . Move the pins around to stretch our jumping puppet into a cartoonish character. Inside the book, I’ve got a list of tips on how to move and constrain pins to best express your artistic desires. Once you get the position the way you want it, you can either click the checkmark on the right side of the options bar to accept your changes, or simply press Enter or Return.
12. Turn the Type layer into a smart object . Applying Puppet Warp is almost more fun with type than it is with people. But before you can apply the distortion to the type layer, you either need to rasterize the type (i.e., convert it to pixels) or turn it into a smart object. We’ll choose the latter.
13. Re-invoke the Puppet Warp command and distort the individual letters . You can see the pins I set for distorting the other letters in the text layer. For letters like the U and the M, I pulled up the tops of each stroke separately and made sure to anchor the lower points with pins of their own. Each letter acts as a separate object. Finally, I repositioned the subject’s legs to better fit with my text: Just choose Edit > Puppet Warp to re-enter the mode and modify your distortions.
Voila, both subject and text are suitably, if ridiculously, stretched using the magic of Puppet Warp and the background filling convenience of Content Aware Fill.
具体描述
读后感
看的是lynda.com 的dvd,好像和这本书的dvd是一样的。 几百个视频算通过各种例子把ps中的工具都解释了,之前看着不知何意的工具经过解释后都很清晰。虽然有些例子做的不够好。特别把photoshop打印相关处理也介绍了,整体算作基础。
评分看的是lynda.com 的dvd,好像和这本书的dvd是一样的。 几百个视频算通过各种例子把ps中的工具都解释了,之前看着不知何意的工具经过解释后都很清晰。虽然有些例子做的不够好。特别把photoshop打印相关处理也介绍了,整体算作基础。
评分看的是lynda.com 的dvd,好像和这本书的dvd是一样的。 几百个视频算通过各种例子把ps中的工具都解释了,之前看着不知何意的工具经过解释后都很清晰。虽然有些例子做的不够好。特别把photoshop打印相关处理也介绍了,整体算作基础。
评分看的是lynda.com 的dvd,好像和这本书的dvd是一样的。 几百个视频算通过各种例子把ps中的工具都解释了,之前看着不知何意的工具经过解释后都很清晰。虽然有些例子做的不够好。特别把photoshop打印相关处理也介绍了,整体算作基础。
评分看的是lynda.com 的dvd,好像和这本书的dvd是一样的。 几百个视频算通过各种例子把ps中的工具都解释了,之前看着不知何意的工具经过解释后都很清晰。虽然有些例子做的不够好。特别把photoshop打印相关处理也介绍了,整体算作基础。
用户评价
相关图书
本站所有内容均为互联网搜索引擎提供的公开搜索信息,本站不存储任何数据与内容,任何内容与数据均与本站无关,如有需要请联系相关搜索引擎包括但不限于百度,google,bing,sogou 等
© 2025 book.wenda123.org All Rights Reserved. 图书目录大全 版权所有


